

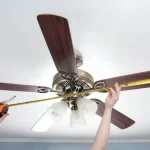


Cleaning a fan be it a ceiling fan or a window fan is an important task to maintain its efficiency and ensure clean air circulation in your living space. Over time, dust, dirt, and debris can accumulate on the fan blades, housing, and grill, affecting its performance and air quality. Regular cleaning not only improves airflow but also helps prolong the lifespan of the fan. By following the right techniques and using appropriate cleaning materials, you can effectively clean your window fan and enjoy its benefits to the fullest.
Contents
I live in a building attached to the road where there is continuous movement of traffic. Due to this, there is a lot of dust accumulating in our window fans. I clean the window fans almost every 15 days. Here in this article, I shall share the steps on how to clean a window fan? It’s a very easy and simple process, but you need to do it carefully.

How To Clean a Window Fan? – Step-by-Step Guide
Cleaning a window fan is essential to maintain its performance and ensure clean and cool airflow in your home. Follow these step-by-step instructions to effectively clean your window fan:
Note: Before starting the cleaning process, make sure the fan is turned off and unplugged from the electrical outlet. This ensures your safety during the cleaning process.
Remove the Fan From the Window
- Refer to the manufacturer’s instructions or user manual for specific guidance on removing the fan from the window. Different models may have varying installation methods.
- Some fans are secured with screws. Use a screwdriver to carefully remove the screws and detach the fan from the window frame.
- For fans with clips or latches, release them to free the fan from the window.
Prepare the Cleaning Materials
- Gather the necessary materials – a soft brush or vacuum cleaner with a brush attachment, mild dish soap or window cleaner, a clean, lint-free cloth, and a screwdriver if needed.
- Dilute the mild dish soap or window cleaner in water to create a cleaning solution.
Clean the Fan Blades
- Use a soft brush or the brush attachment of a vacuum cleaner to remove loose dust and debris from the fan blades.
- Start from the center of the blades and gently brush or vacuum towards the edges. Take care not to bend or damage the blades.
- Dampen the clean cloth with the mild dish soap or window cleaner solution.
- Wipe each fan blade thoroughly, applying gentle pressure to remove any stubborn dirt or stains.
- Pay attention to crevices and hard-to-reach areas, using a cotton swab or small brush if necessary.
- Dry the blades completely with a clean, dry cloth to prevent moisture-related issues.
Clean the Fan Housing
- Use the soft brush or vacuum cleaner to remove dust and debris from the housing.
- Pay special attention to corners, edges, and vents where dirt tends to accumulate.
- Dampen the cloth with the mild dish soap or window cleaner solution.
- Wipe both the interior and exterior surfaces of the fan housing thoroughly.
- Ensure all stains, grime, and fingerprints are removed.
- Dry the housing completely with a clean, dry cloth before reassembly.
Clean the Fan Grill or Filter
- Check the manufacturer’s instructions to determine if your fan has a removable grill or filter.
- If applicable, remove the grill or filter according to the instructions provided.
- Rinse the grill or filter under running water to remove loose dirt and debris.
- Use mild dish soap or window cleaner and a soft brush or sponge to gently scrub away stubborn stains.
- Thoroughly rinse the grill or filter to remove any cleaning residue.
- Allow the grill or filter to air dry completely before reattaching it to the fan.
Reassemble and Reinstall the Fan
- Ensure all components, including the blades, housing, grille, and filter, are completely dry.
- Follow the manufacturer’s instructions for reassembling the fan.
- Make sure all components fit securely and align correctly.
- Carefully reinstall the fan back onto the window frame, using screws or clips to secure it.
- Plug in the fan and turn it on to verify that it is functioning properly.
By following these steps and maintaining regular cleaning, you can ensure your window fan operates efficiently and provides clean airflow in your home.
- Regularly dust and wipe down the fan to prevent dust and dirt buildup.
- Follow the manufacturer’s recommendations for replacing or cleaning the fan filter.
- Store the fan properly when not in use to protect it from dust and damage.
Indicators that Show Its Time to Clean Your Window Fan
Before cleaning a window, you should know what are the indicators that show its time to clean your window fan. Here are a few indicators that may suggest it’s time to clean your window fan:
- Reduced Airflow: If you notice a decrease in the fan’s performance or weak airflow, it could indicate that the blades or the fan’s housing are obstructed by dust and dirt. Cleaning the fan can help restore optimal airflow.
- Visible Dust or Dirt Buildup: If you can visibly see a layer of dust or dirt on the fan blades, housing, or grille, it’s a clear sign that cleaning is necessary. Dust accumulation not only affects the fan’s efficiency but also reduces the quality of the circulated air.
- Allergy Symptoms or Poor Air Quality: If you or your household members are experiencing increased allergy symptoms or the air in the room feels stuffy or stale, it could be a result of a dirty window fan. Regular cleaning helps remove allergens and improves air quality.
- Seasonal Cleaning: It’s recommended to clean your window fan before the start of each cooling season, especially if the fan has been stored or unused during the off-season. This helps ensure that it operates efficiently and provides clean air throughout the season.
Remember, these are general guidelines, and you should adjust the cleaning frequency based on your specific circumstances. Regular maintenance and periodic cleaning will help maintain your window fan’s performance and prolong its lifespan.
How Often Should One Clean a Window Fan?
The frequency of cleaning your window fan depends on various factors such as the environment in which it operates, the amount of dust and debris present, and how frequently the fan is used. As a general guideline, it is recommended to clean your window fan at least once every month or as needed. However, if you notice a significant buildup of dust, dirt, or reduced airflow, it’s advisable to clean the fan more frequently may be every week.
Conclusion
In conclusion, cleaning a window fan is a straightforward process that can significantly improve its performance and maintain clean air circulation in your home. By following the steps outlined in this guide, including removing dust, wiping down the housing, cleaning the grille or filter, and reassembling the fan properly, you can ensure optimal airflow and a healthier living environment. Remember to clean your window fan regularly, adjusting the frequency based on usage and environmental factors. With proper maintenance, your window fan will continue to provide fresh and cool air for a long time to come.


Add Comment